출시: Zebra의 새로운 지원 센터를 만나보세요. 더 스마트하고 빠른 서포트를 경험하실 수 있습니다.
Zebra 배터리 교체 절차
선제적 배터리 교체는 Zebra 모바일 컴퓨터 대상 핵심 Zebra OneCare™ 유지보수 계획에 대한 새로운 서비스 개선 사항입니다. 배터리 잔여 수명이 30일 미만이면 사전에 교체합니다. 이 범주에서 확인된 모든 배터리는 서비스 온보딩 중에 제공된 정보에 근거해 최종사용자 위치로 교체품을 배송합니다. 새로운 서비스가 대신하여 모든 일을 하기 때문에 어떤 배터리를 교체해야 하는지 추측해야 하는 일이 필요 없습니다. 예측 분석 알고리즘을 사용하여 모든 배터리를 매일/매월 모니터링합니다. 다음 30일 안에 장애가 있을 배터리를 Zebra가 식별하면 새 배터리를 배송해 드립니다. 최종사용자 위치에서 새 배터리를 수령하면 불량 배터리를 교체하고 이전 배터리는 고객 운영 환경에서 제거할 수 있습니다.
사전 예방적 배터리 교체 서비스는 현재 다음 지역/국가에서 제공됩니다(현재 모바일 장치 포함, 프린터 및 태블릿은 향후 포함 예정).
- EMEA - EU, 영국, 스위스
- NA - 미국 및 캐나다
서비스가 판매될 주요 지역은 Zebra DC 위치의 지상 화물 기지에서 배송을 지원할 수 있는 자유 무역 지역입니다.
모바일 컴퓨터를 선택하세요
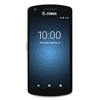
배터리 교체 단계는 모든 EC50 및 EC55 모델에 적용됩니다.
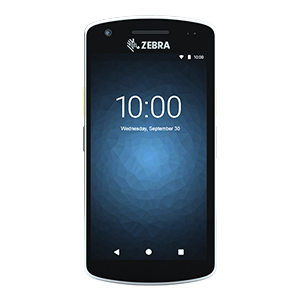
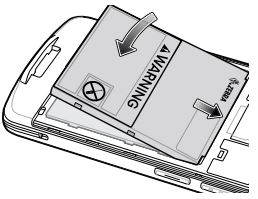
1. 왼쪽 상단 모서리에 있는 홈에서 손톱이나 플라스틱 도구를 사용하여 배터리 덮개를 들어 올립니다.
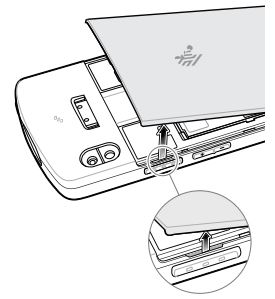
2. 배터리 당김 탭을 사용하여 배터리 칸에서 배터리를 들어 올려 꺼냅니다.
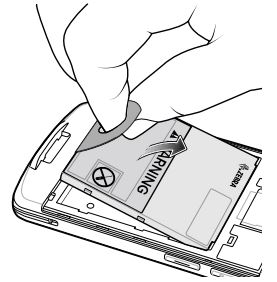
3. 배터리 뒷면의 접착 라이너를 벗겨냅니다.
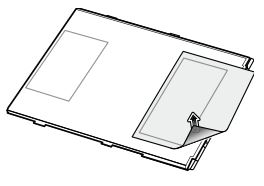
4. 상단부터 경고 라벨이 위로 향하도록 배터리를 배터리 칸에 끼웁니다.
5. 배터리를 배터리 칸 안으로 밀어 넣습니다.
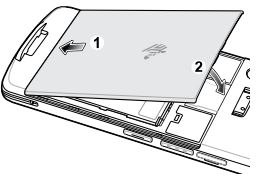
6. 배터리 커버를 하단부터 배터리 칸에 끼웁니다.
7. 배터리 덮개를 아래로 돌려 배터리 칸에 넣습니다.
(확장 배터리를 설치할 때, 확장 배터리 커버를 사용하십시오.)
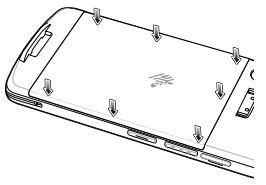
8. 측면의 홈이 제자리에 고정될 때까지 배터리 덮개의 측면을 아래로 누릅니다.
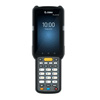
배터리 교체 단계는 MC3000, MC3300R, MC3300x, MC3300xR 및 MC3300ax 등의 모든 MC33 시리즈 모델에 적용됩니다.
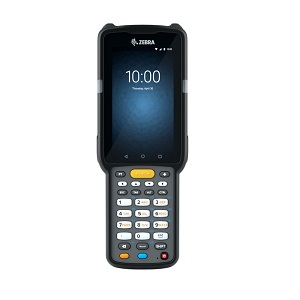
1. 두 개의 기본 배터리 분리 버튼을 누릅니다. 메모리 지속성 유지를 위해 5분 이내에 배터리를 교체하십시오.
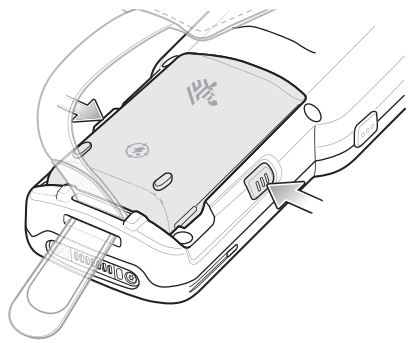
2. 배터리를 배터리 칸에서 꺼냅니다.
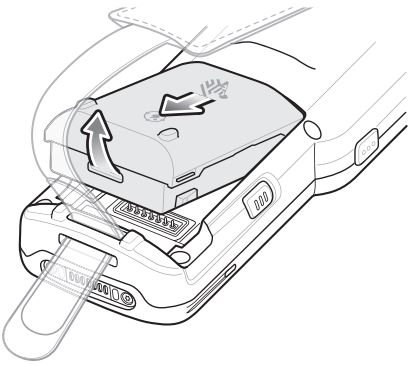
3. 배터리 전면을 배터리 구획에 밀어 넣기
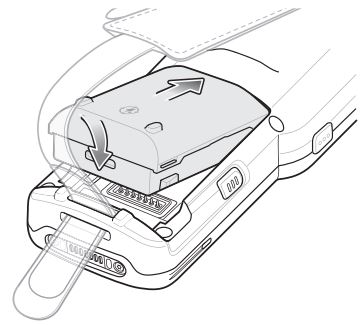
4. 배터리를 아래로 단단히 누릅니다. MC33 측면에 있는 두 배터리 분리 버튼이 모두 홈 위치로 돌아가는지 확인하십시오.
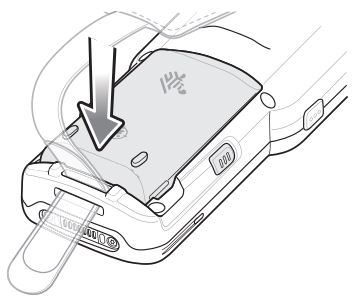
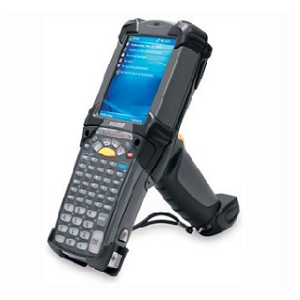
배터리 교체 단계는 다음에 적용됩니다:
MC9000, MC9060, MC9060-G, MC9090 CE, MC9090-G, MC9090 WM 및 MC9090-Z 등의 모든 MC90 시리즈 모델.
모든 MC92 시리즈.
1. 배터리를 제거하기 전에, 빨간색 전원 버튼을 누릅니다.
2. Safe Battery Swap을 탭합니다.
3. LED 표시등 막대가 빨간색으로 켜집니다.
4. LED 표시등이 꺼지면 기본 배터리 분리1)를 누릅니다. 배터리가 장치에서 부분적으로 빠져 나옵니다.
5. 배터리 상단에 있는 보조 배터리 분리 장치(2)를 누르고 배터리를 기기에서 밀어 꺼냅니다.
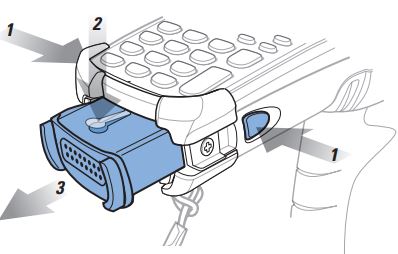
배터리 교체 단계는 모든 MC93 시리즈 모델에 적용됩니다.
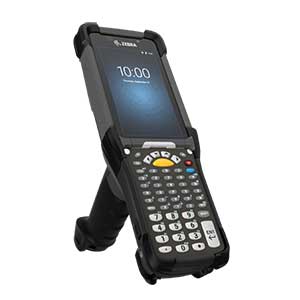
1. 두 개의 기본 배터리 분리 버튼을 누릅니다.
배터리가 약간 빠져 나옵니다. Hot Swap 모드에서 배터리를 제거하면 디스플레이가 꺼지고 장치가 저전력 상태로 전환됩니다. 장치는 약 5분 동안 RAM 데이터를 유지합니다. 메모리 지속성 유지를 위해 5분 이내에 배터리를 교체하십시오.
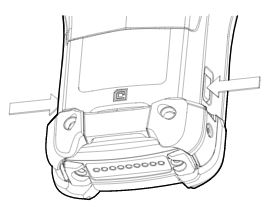
2. 배터리 측면에 있는 보조 배터리 분리 버튼을 누릅니다.
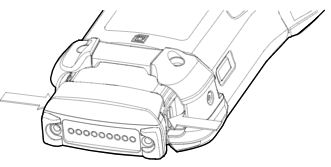
3. 배터리를 배터리 슬롯에서 꺼냅니다.
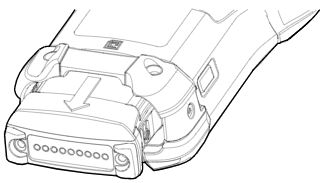
4. 배터리를 배터리 슬롯에 맞추고 배터리를 배터리 슬롯에 밀어 넣습니다.
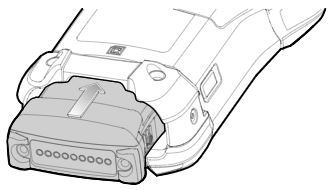
5. 배터리를 배터리 홈 안으로 단단히 누릅니다.
장치 측면에 있는 두 배터리 분리 버튼이 모두 홈 위치로 돌아가는지 확인하십시오. 장치 측면에 있는 두 배터리 분리 버튼이 모두 홈 위치로 돌아와 배터리를 제자리에 고정하면 딸깍 소리가 들립니다.
6. 전원을 눌러 장치를 켭니다.
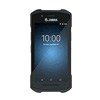
배터리 교체 단계는 모든 TC21 및 TC26 시리즈 모델에 적용됩니다.
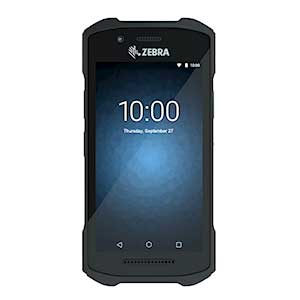
1. 메뉴가 나타날 때까지 전원 버튼을 누릅니다.
2. Power Off(전원 끄기)를 터치합니다.
3. 장치가 완전히 꺼질 때까지 기다립니다.
4. 핸드 스트랩이 부착되어 있는 경우 핸드 스트랩 클립을 장치 하단에서 밀어낸 다음 들어올립니다.
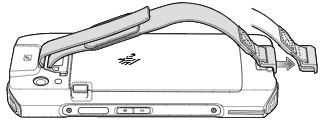
5. 두 개의 배터리 래치를 누릅니다.
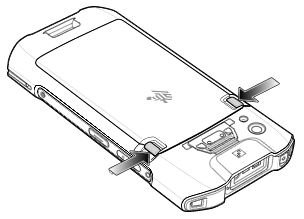
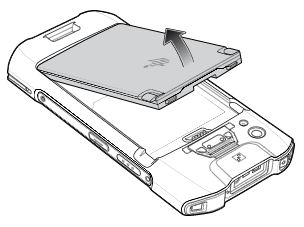
6. 장치에서 배터리를 들어 올립니다.
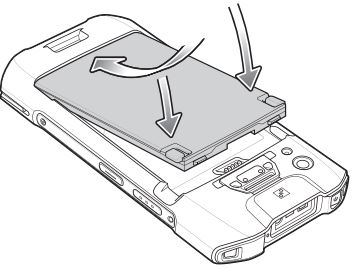
7. 교체용 배터리를 하단부터 장치 뒷면의 배터리 칸에 끼웁니다.
8. 배터리 분리 래치가 제자리에 고정될 때까지 배터리를 아래로 누릅니다.
9. 필요한 경우 핸드 스트랩을 교체합니다.
10. 전원 버튼을 눌러 장치를 켭니다.
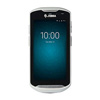
배터리 교체 단계는 모든 TC51, TC52, TC56 및 TC57 시리즈 모델에 적용됩니다.
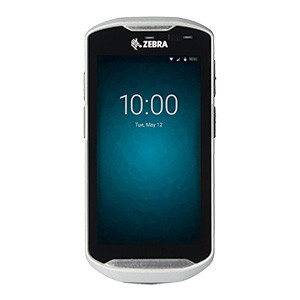
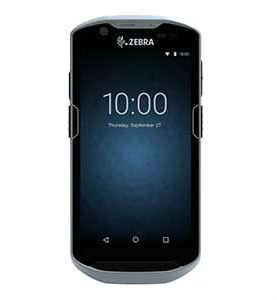
주의: 배터리 교체 중에는 microSD 카드를 추가하거나 제거하지 마십시오.
1. 메뉴가 나타날 때까지 전원 버튼을 누릅니다.
2. Battery Swap을 터치합니다.
3. 화면의 지시를 따릅니다.
경고: 빨간색 LED가 완전히 꺼질 때까지 배터리를 제거하지 마십시오. 데이터가 손실될 수 있습니다.
4. 빨간색 LED가 완전히 꺼질 때까지 기다립니다.
5. 핸드 스트랩이 부착되어 있는 경우 핸드 스트랩을 제거합니다.
6. 두 개의 배터리 래치를 누릅니다.
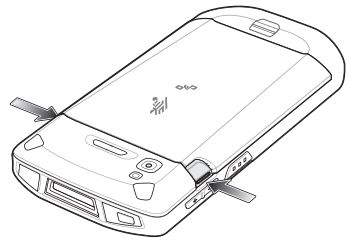
7. 장치에서 배터리를 들어 올립니다.
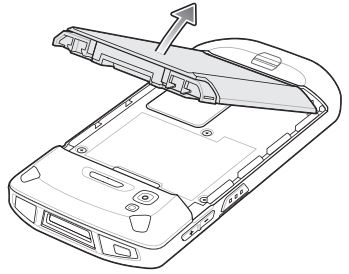
8. 교체용 배터리를 하단부터 장치 뒷면의 배터리 칸에 끼웁니다.
9. 배터리 분리 래치가 제자리에 고정될 때까지 배터리를 아래로 누릅니다.
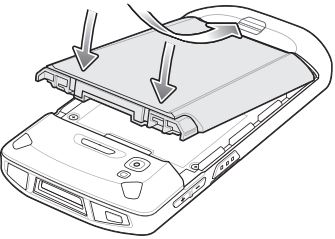
10. 필요한 경우 핸드 스트랩을 교체합니다.
11. 전원 버튼을 눌러 장치를 켭니다.
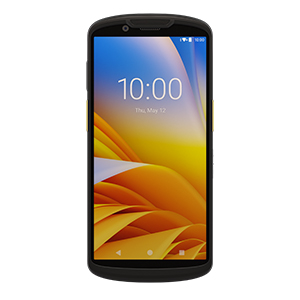
참고 - True Hot Swap은 프리미엄 장치에만 적용됩니다.
True Hot Swap을 수행하려면:
1. 핸드 스트랩이 부착되어 있는 경우 핸드 스트랩을 제거합니다.
2. 배터리 래치를 눌렀다가 들어 올려 장치에서 배터리를 제거합니다. 30초 카운트다운 타이머가 표시됩니다. 백업 슈퍼 커패시터가 즉시 인계받아 디스플레이가 어두워진 상태에서 장치에 전원이 공급됩니다.
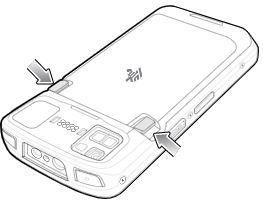
참고: 30초(최대) 후에도 배터리를 교체하지 않으면 장치 디스플레이가 꺼지고 장치는 추가로 60초(최대) 동안 메모리 지속 상태로 들어갑니다.
3. 교체용 배터리를 하단부터 장치 뒷면의 배터리 칸에 끼웁니다.
4. 배터리 분리 래치가 제자리에 고정될 때까지 배터리를 아래로 누릅니다. 장치 디스플레이가 꺼지면 자동으로 켜집니다.
참고: 장치가 자동으로 켜지지 않으면 전원 버튼을 6초 동안 길게 누르면 장치가 재부팅됩니다.
5. 필요한 경우 핸드 스트랩을 교체합니다.
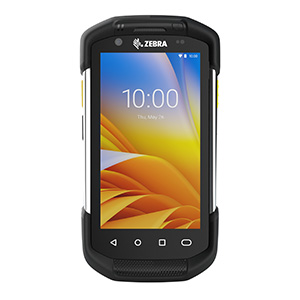
배터리 교체 단계는 모든 TC70, TC70x, TC72, TC75, TC75x 및 TC77 시리즈 모델에 적용됩니다.
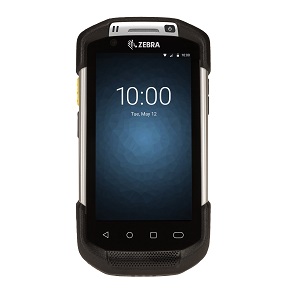
주의: 배터리 교체 중에는 microSD 카드를 추가하거나 제거하지 마십시오.
1. 장치에 부착된 모든 액세서리를 제거합니다.
2. 메뉴가 나타날 때까지 전원 버튼을 누릅니다.
3. Battery Swap을 터치합니다.
4. 화면의 지시를 따릅니다.
5. LED가 꺼질 때까지 기다립니다.
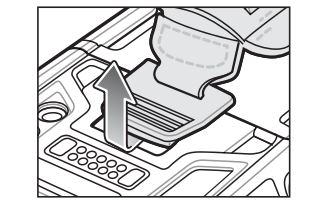
6. 핸드 스트랩이 부착된 경우 핸드 스트랩 클립을 장치 위쪽으로 민 다음 들어올립니다.
7. 두 개의 배터리 래치를 누르고 장치에서 배터리를 들어 올립니다.
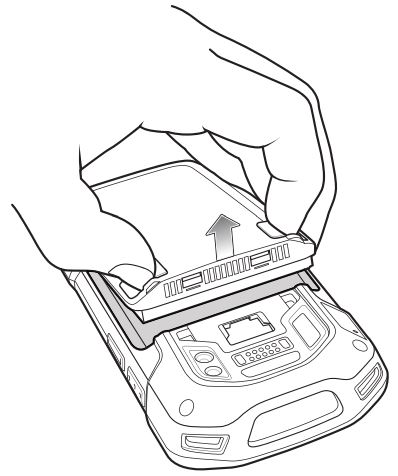
주의: 2분 이내에 배터리를 교체하십시오. 2분 후에 장치가 재부팅되고 데이터가 소실될 우려가 있습니다.
8. 교체용 배터리를 하단부터 장치 뒷면의 배터리 칸에 끼웁니다.
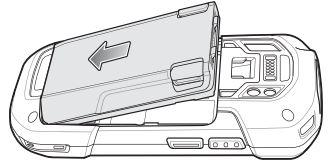
9. 배터리 분리 래치가 제자리에 고정될 때까지 배터리를 아래로 누릅니다.
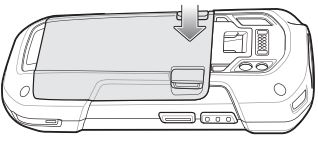
10. 필요한 경우 핸드 스트랩을 교체합니다.
11. 전원 버튼을 길게 눌러 장치를 켭니다.
참고: 배터리를 교체한 후 Battery Swap(배터리 교체)을 다시 사용하기 전에 15분을 기다리십시오.
